Get ready to embrace the vibrant and cheerful world of Rainbow Nail Art with our collection of 30+ Colorful Creations. These stunning nail art ideas are guaranteed to bring a smile to your face and brighten your day. From playful and whimsical designs to sophisticated and elegant patterns, there’s something for every mood and style. Let your fingertips become a canvas of vibrant hues as you explore the endless possibilities of rainbow-inspired nail art. Whether you prefer bold and striking designs or subtle and delicate accents, our curated selection has you covered. Get ready to elevate your nail game and spread joy with these 30+ Rainbow Nail Art Ideas that are sure to add a colorful touch to your style.
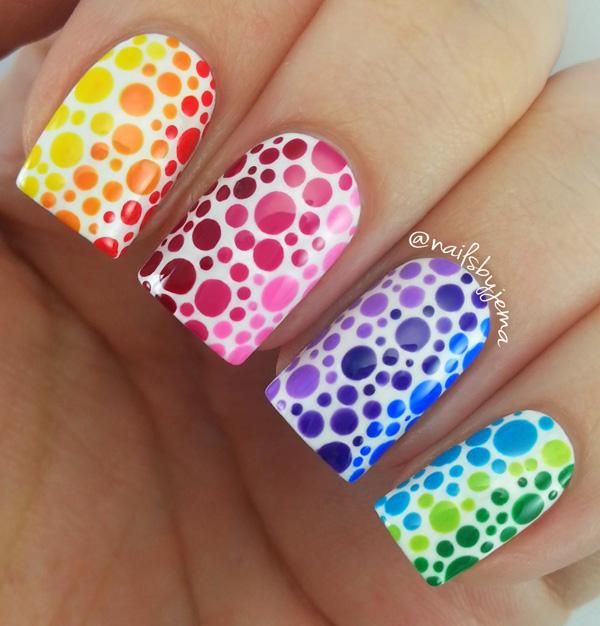
A subtle and fun way of making rainbow-inspired nails is through polka dots. However instead of scattering the colors, you can arrange them well to fit the colors of the rainbow and for a cleaner look.
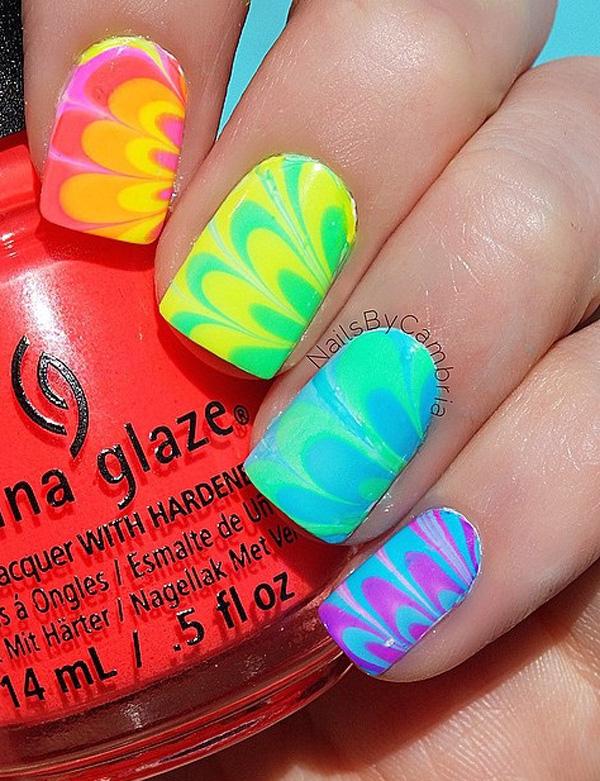
Marbling your nail polish is another stunning way of making your nails look better. Although it’s tricky, it definitely has a great result.
Adding a little bit of glitters on top will make your nails look much more girly if that’s what you’re aiming for.
Rainbow is beautiful but it could look better by using shades that are lighter and softer. This goes well on nails if you want a subtle but more feminine approach.
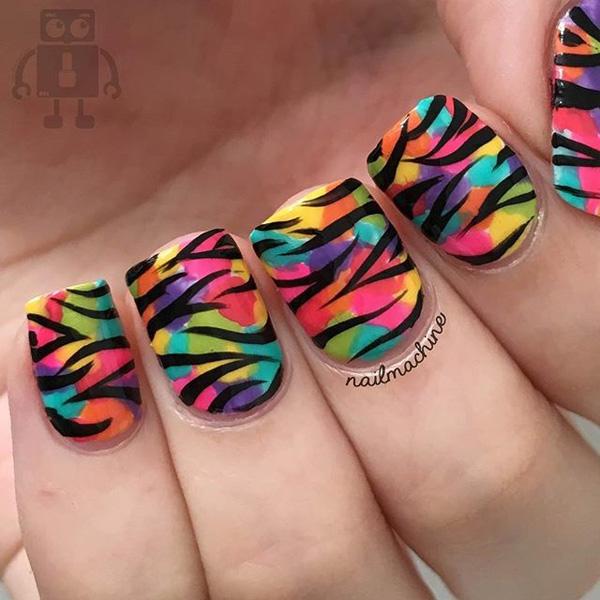
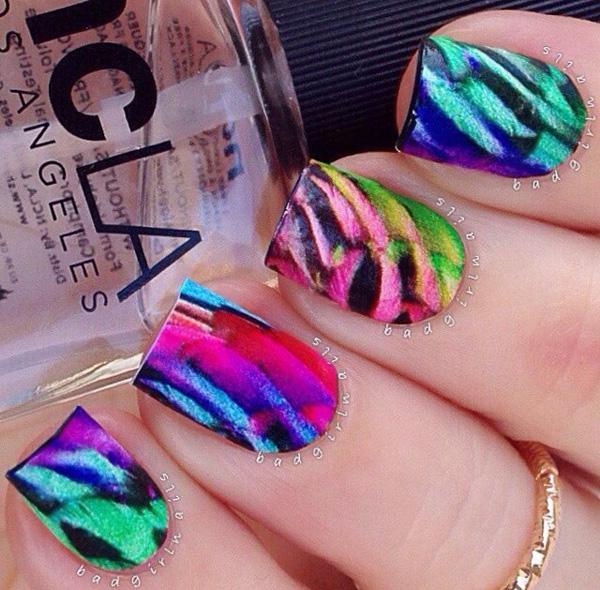
Another variation of the zebra-type print on top of a rainbow-base nail. The base is more like patches of colors of the rainbow and the stripes are smaller.
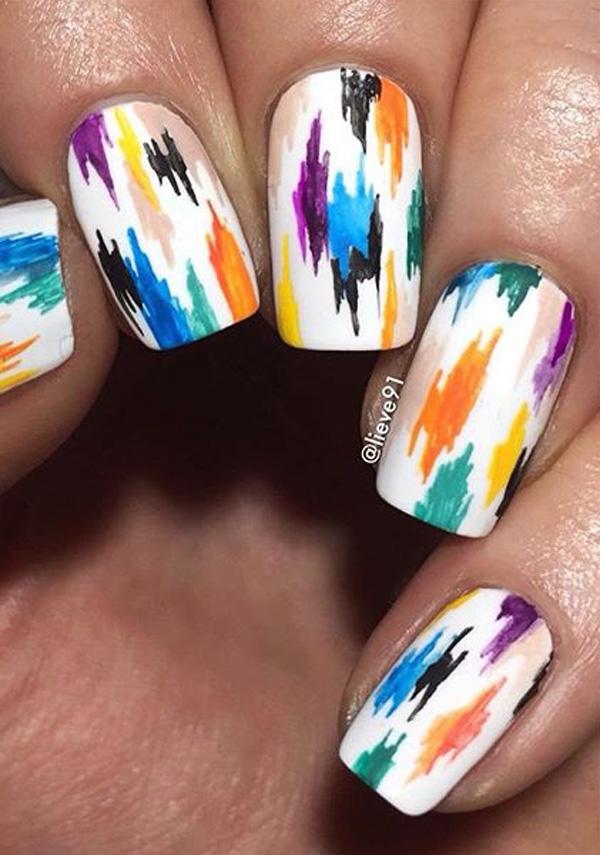
This abstract-looking nail polish may look a bit unusual, but the colors mix well with each other. Dark shades on a white background make it more appealing.
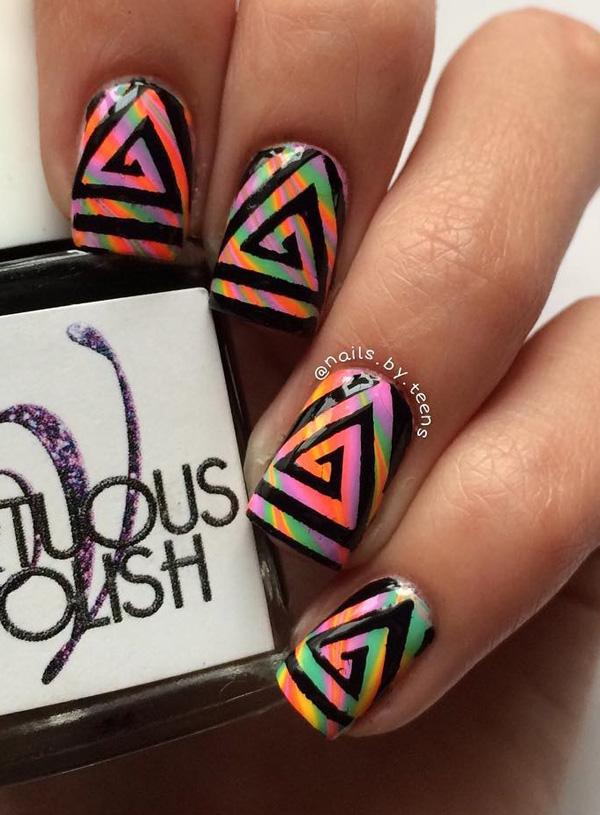
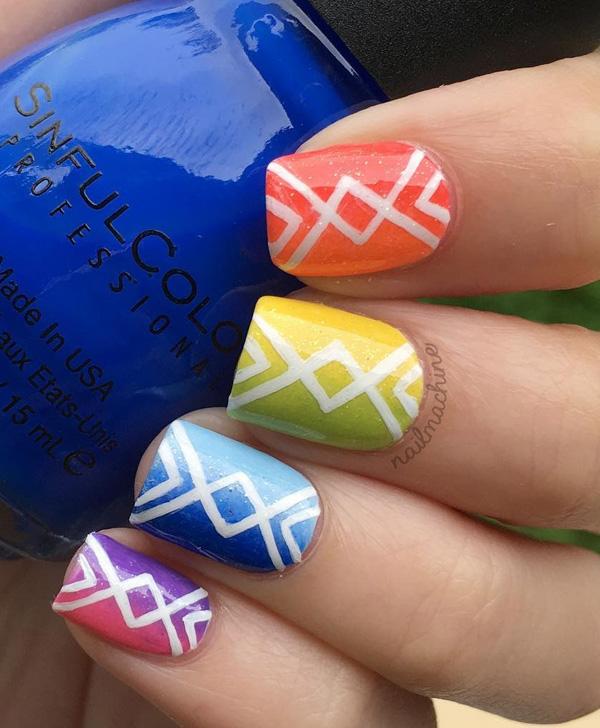
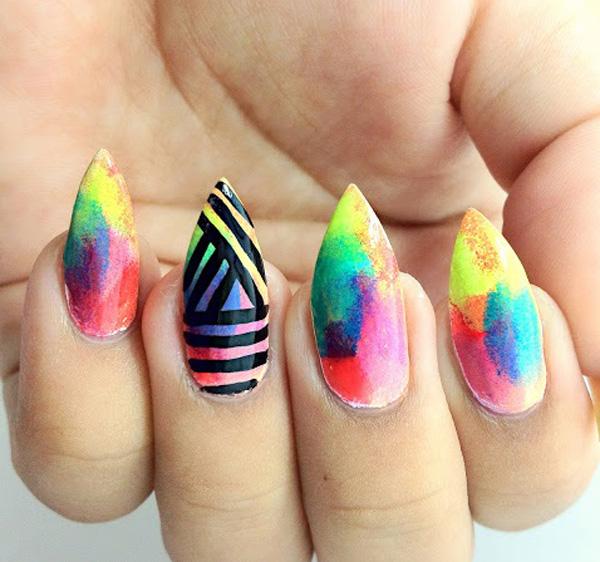
If you don’t like zebra stripes, you can try many different stripes, lines or any pattern you like. For instance, a black triangular pattern works well on a rainbow base.
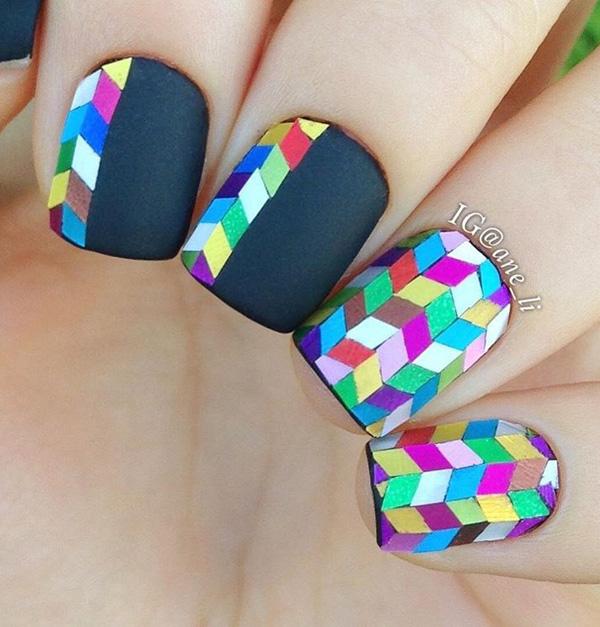
If you’re a little more creative and you have more time, you can try this cool nail art design. Use a darker matte nail polish as base. Then you may need different colors of nail stripes. Cut them into smaller triangles and then tape them to your nails just like here.
Make patches of the colors of your choice and dab them carefully to blend the outer parts. Then after it dries, you can take out your black nail polish and create different patterns.
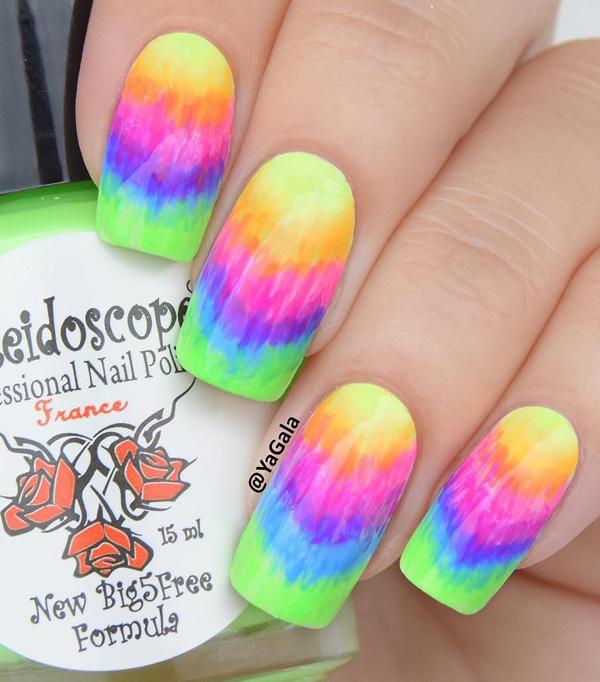
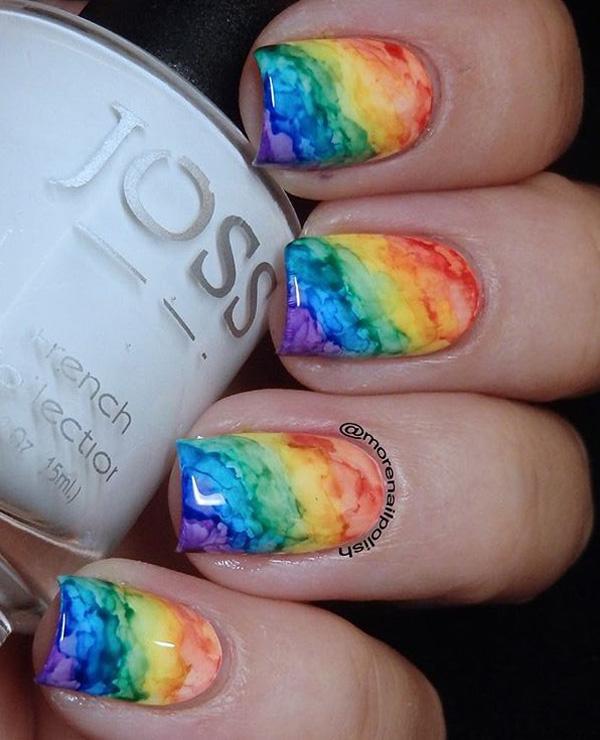
you can try this rainbow nail art design which kinda resembles a tie-dye shirt, right?
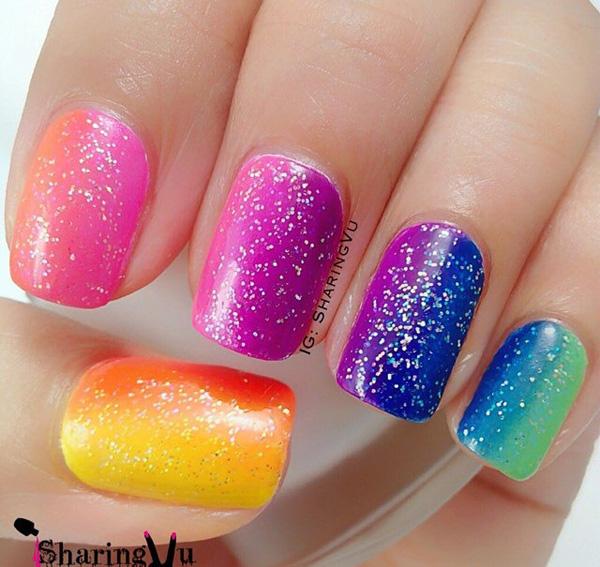
After some rainbow ombre, it’s time for glitters!
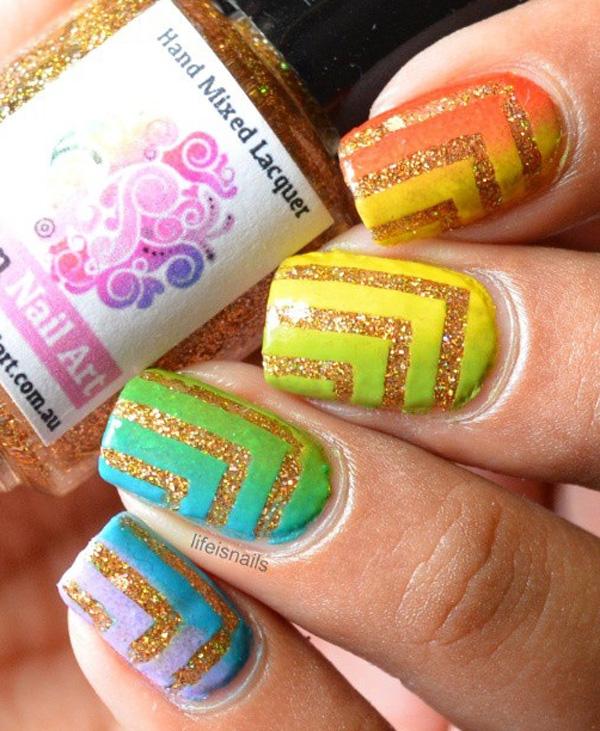
Glitters can be used to give some shine. Or it can be used for a quirky base. For this, use a gold glitter lacquer and let it dry. Once it’s good to go, you can add these lines made from the colors of the rainbow.
If you simply want to shine, you could choose glitters with colors and start creating your glimmering rainbow nails. It’s definitely great for fabulous party and night outs.
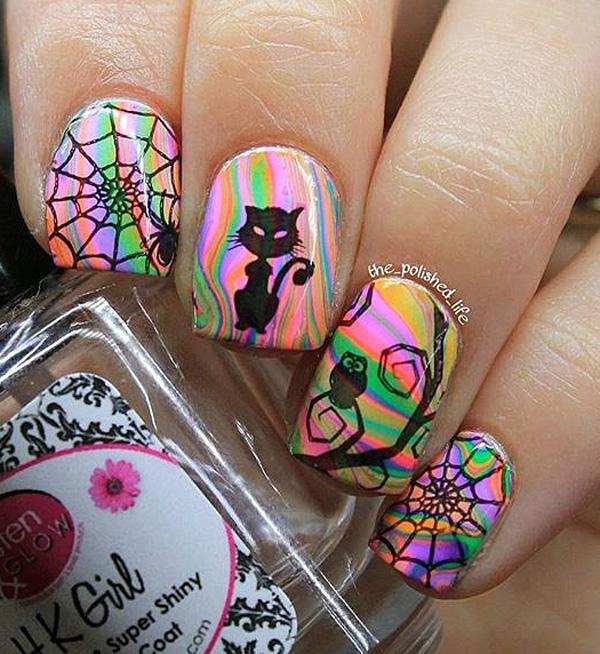
Want to celebrate Halloween but feeling a little girly and fun? With these patterns on your rainbow base, you can definitely do both.
Balance out those sharp nails with some rainbow action. But still make it look edgy with black lines as accent to the whole look.
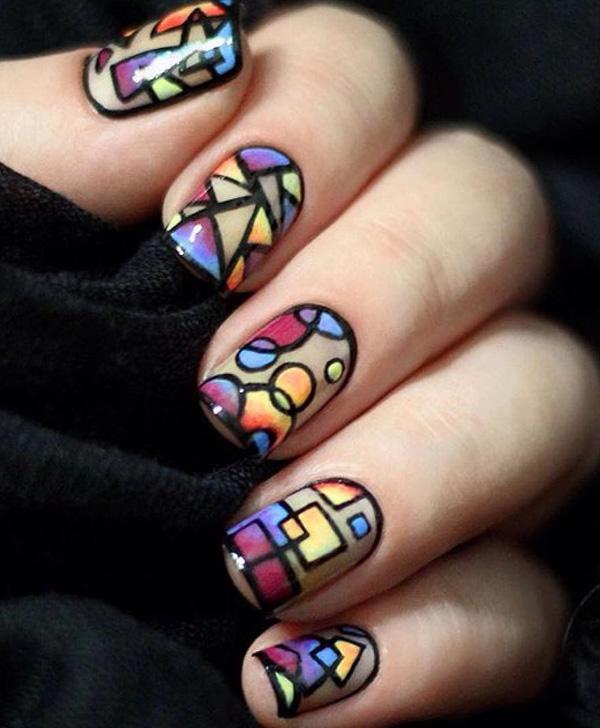
You can choose to go with nude nail polish as the base or you can just add a protective layer of clear nail polish. Then you can start creating the shapes you want. You can then fill those out with different colors. If it’s hard for you to do ombre styles, just fill out one space with one color.
These pretty marbled-like rainbow polish can be hard. But with the right technique and practice, you can likely do them soon. But of course, do find a good tutorial for that.
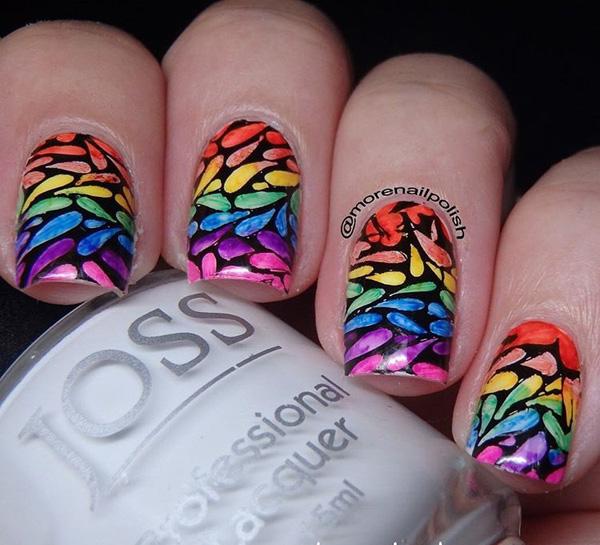
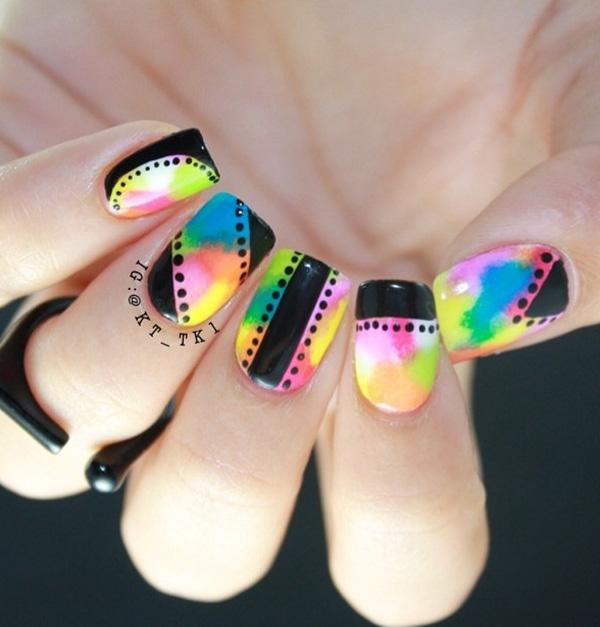
Get those colorful nail polishes and try to recreate this nail art design. First off, use a black nail polish as the base. Then you can do these almost teardrop shapes. Organizing the colors would have a more aesthetic appeal.
Wow your girl friends with this lovely design with different colors. You can try asking your nail salon if they can pull something like this. Or, you can find tutorials and try them yourself.
The classic rainbow strips will never go out of style. You can choose lighter shades so it would feel more like candies on your nails.
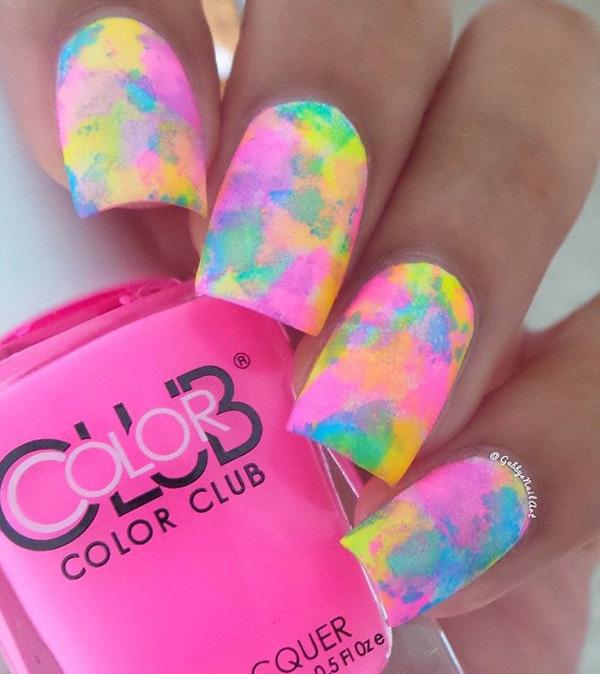
Take out your nail polish colors of choice (you can go with lighter colors and great combos for a better result). Also find a sponge you can use. Drop some little polish on your sponge and dab away. The more you drop, the bigger the splotches are.
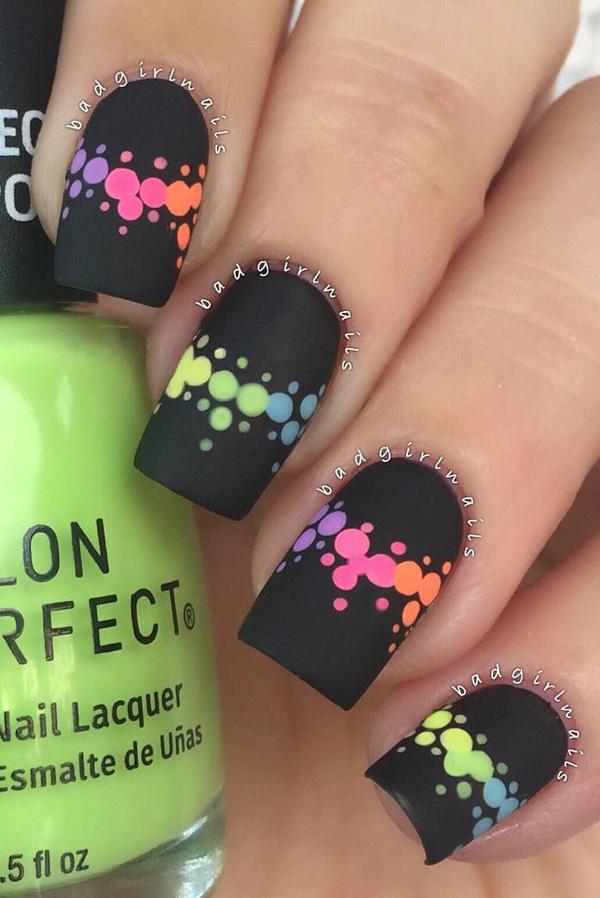
You can still enjoy rainbow nail art designs with matte nail polishes. Choose a black matte as the base so the colors will really be distinct. Then put those dots depending on your design.
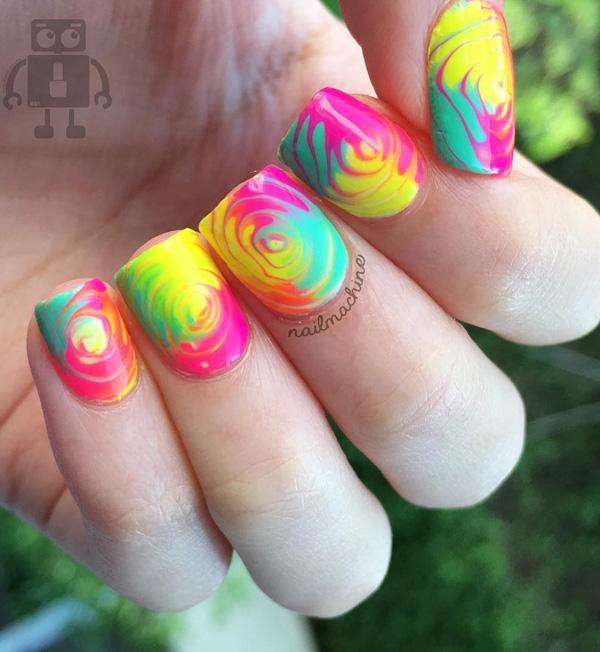
Get your swirls round and round! Choose the most eye popping colors you have and try to do this trick.
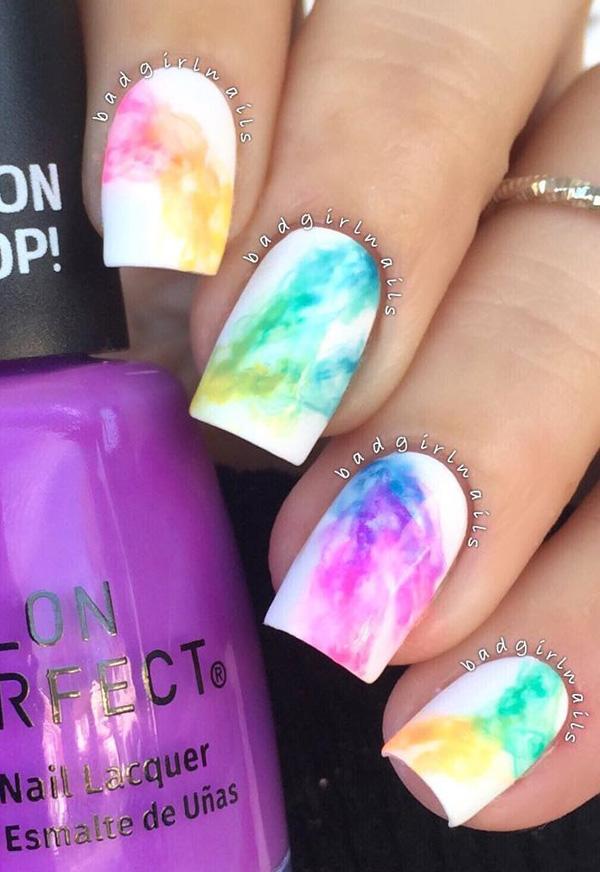
If you’re trying the rainbow nail art design but you want it in a subtle way, you can definitely choose this smokey design. Guess smokey is not just for the eyes, ehh?
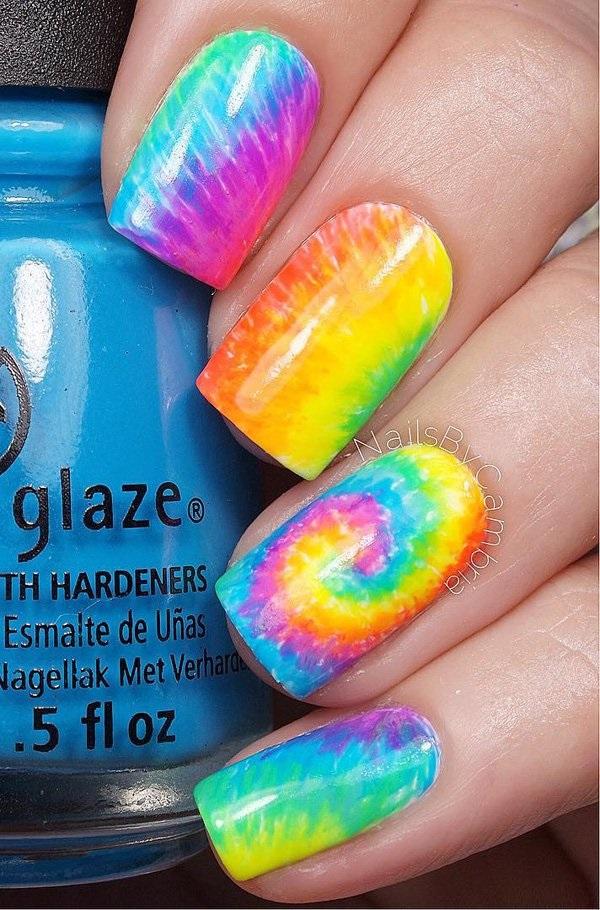
These tie-dye-ish nails are great for the last hint of summ
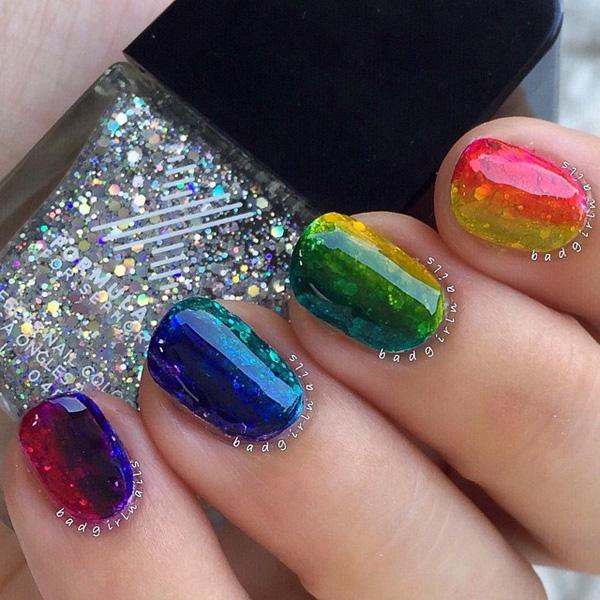
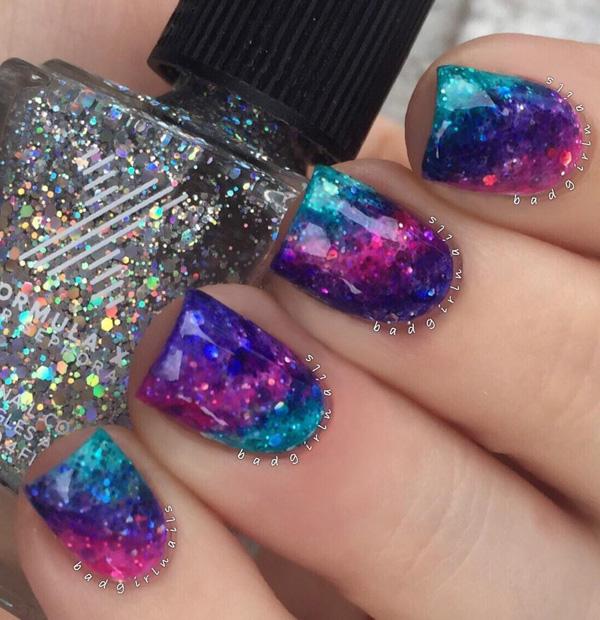
First off, this almost candy-like rainbow themed nails has easily made it possible to create the illusion of crystal-like nails through glitters and a good old transparent protective lacquer.
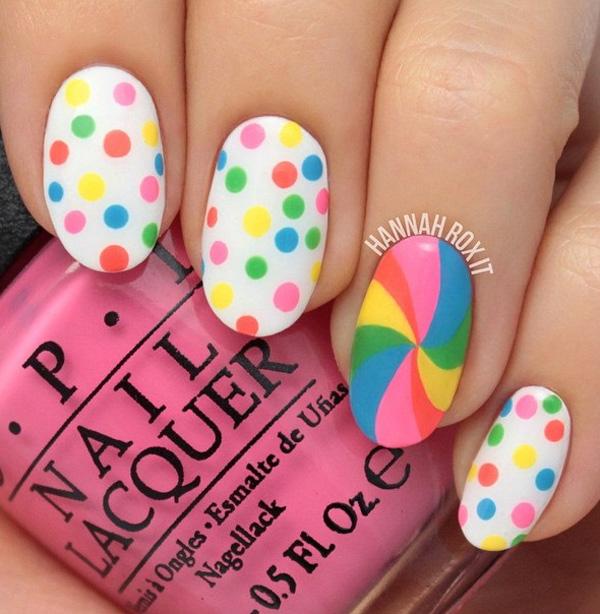
Be preppy and flirty with these cute rainbow polka dots and swirly fun. use lighter shades of the rainbow to make it more appealing on a white nail polish base.
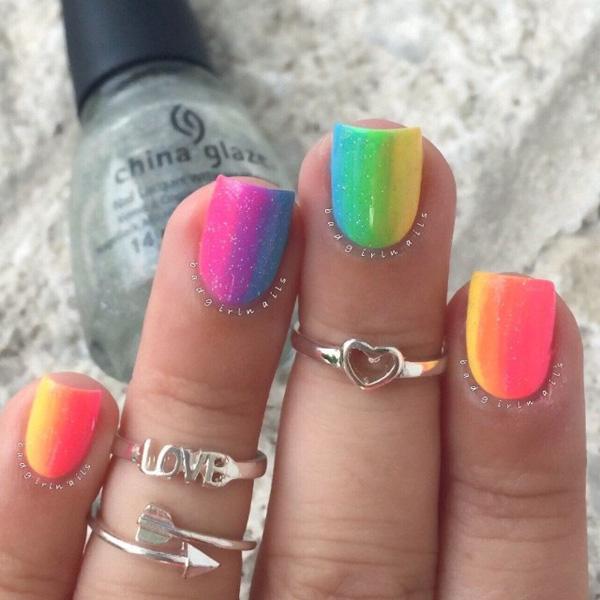
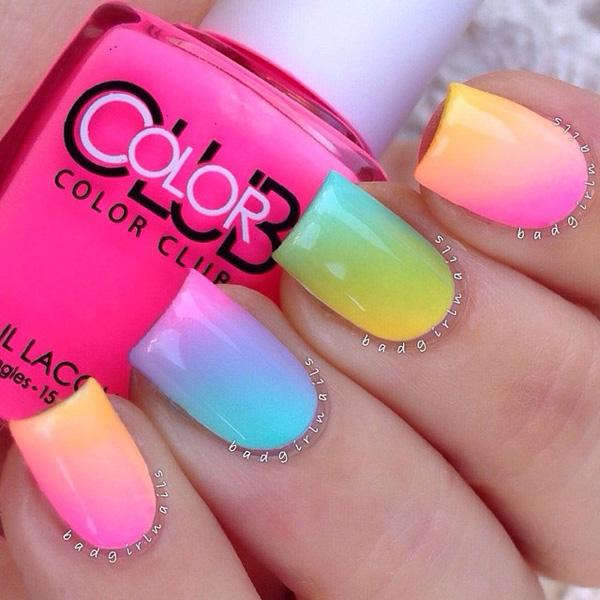
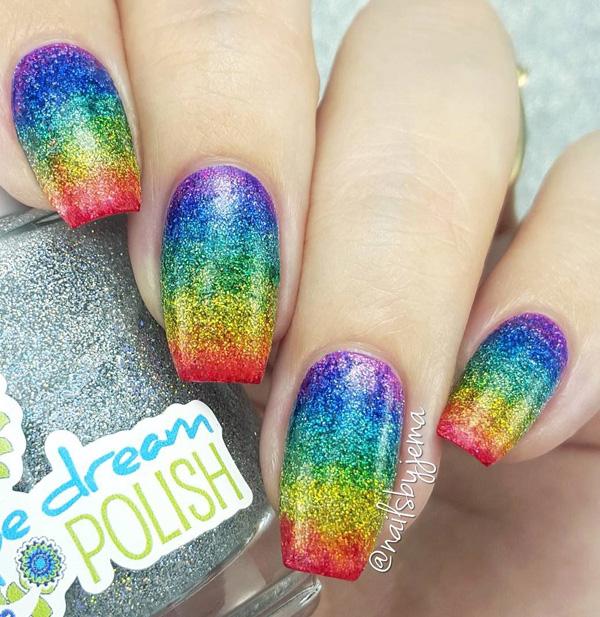
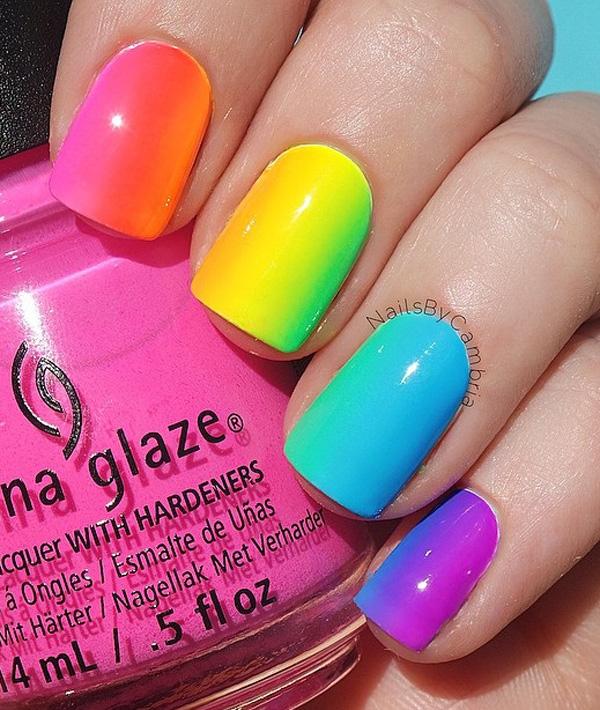
Turn your rainbow obsession into a lovely rainbow ombre and see how the colors blend well into each other; just like a real rainbow!
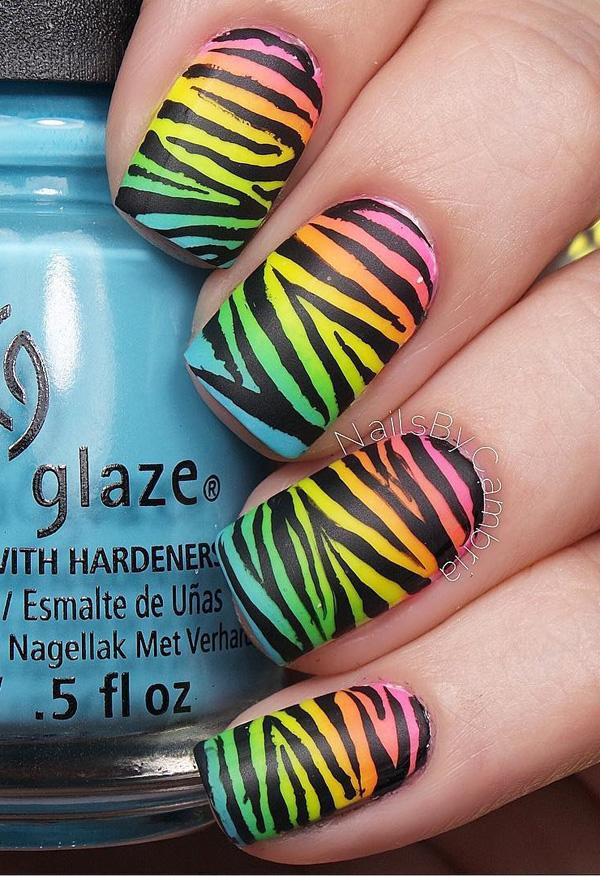
If you are bored with the same old ombre style, you could always put another layer of different styles. For example, use the rainbow ombre as base and top it with zebra-style stripes.
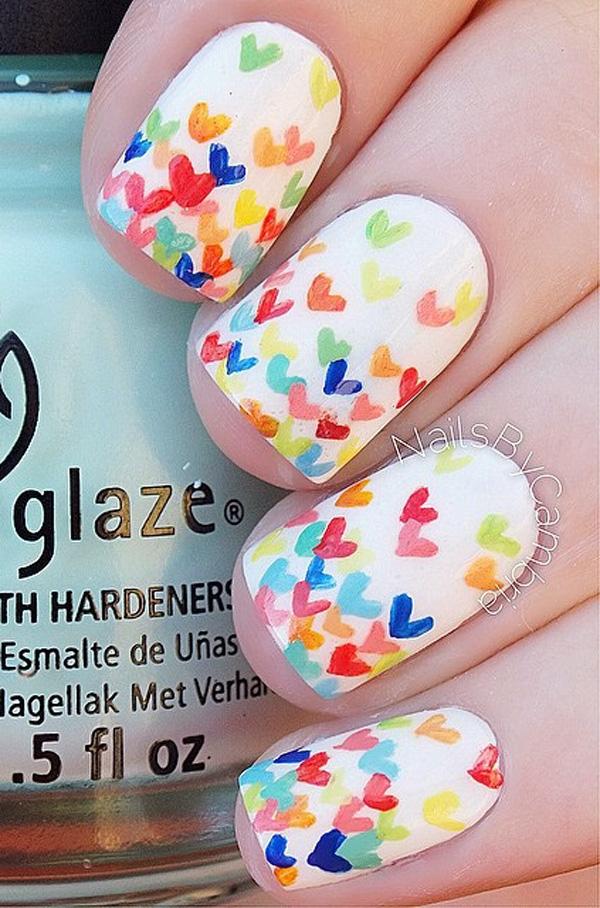
Make it a little fun but simple. With a white base, you could create little hearts in the colors of the rainbow.
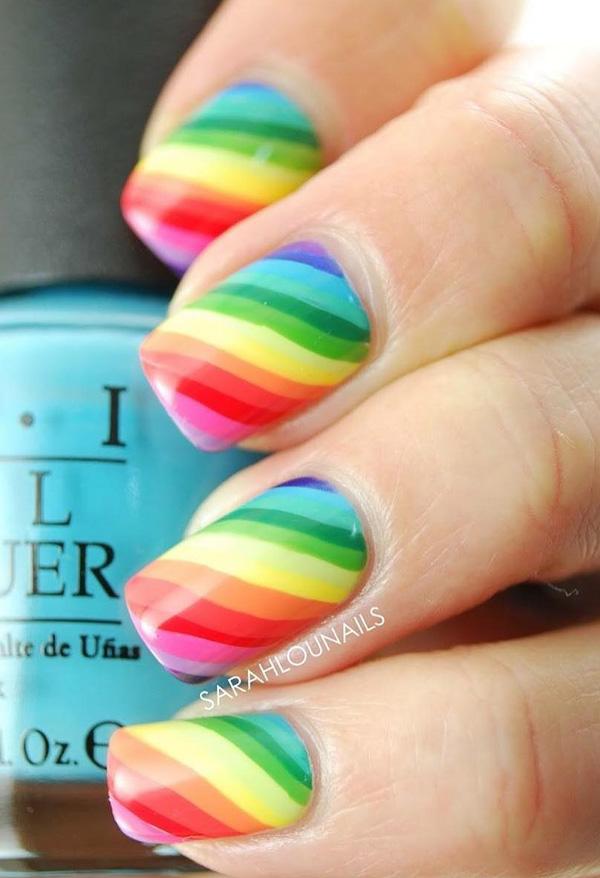
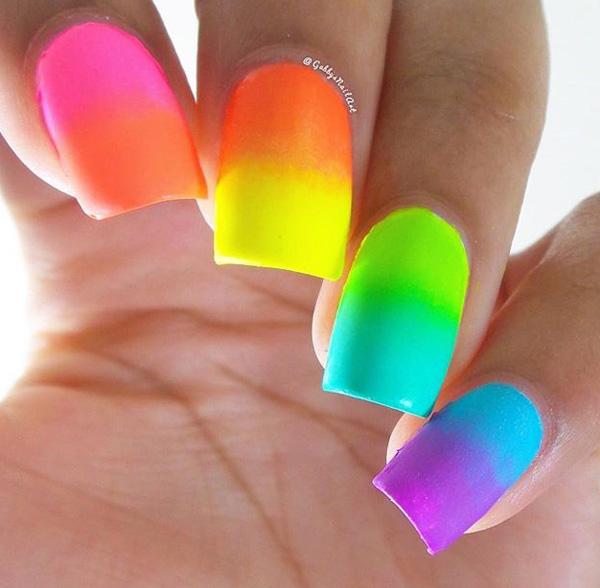
If the horizontal ombre doesn’t really make you see the effect of the rainbow, you can still try it vertically. That way, you could really see how your nails resemble a rainbow.
In case you’re not particularly a fan of certain colors of the rainbow, you could choose the colors you like best. For example, choose the blue, indigo and violet parts and then use it as base. For greater effect, you can top it off with glitters.